
The x001cc3gah EGR delete kit installation instructions provide a comprehensive approach to removing the Exhaust Gas Recirculation (EGR) system from your vehicle. Many automotive enthusiasts and mechanics opt for an EGR delete to improve engine efficiency, reduce carbon buildup, and enhance overall performance. However, installing an EGR delete kit requires technical expertise, the right tools, and strict adherence to legal requirements in your region.
In this article, we will walk you through the step-by-step process of installing the x001cc3gah EGR delete kit, answer frequently asked questions, and explore whether an EGR delete is the right choice for your vehicle.
What is the EGR Delete Process?
The EGR delete process involves removing or bypassing the Exhaust Gas Recirculation (EGR) system to prevent exhaust gases from recirculating into the engine. The EGR system is designed to reduce emissions by reintroducing a portion of exhaust gases back into the combustion chamber. However, this process can lead to carbon buildup, reduced fuel efficiency, and clogged intake manifolds over time.
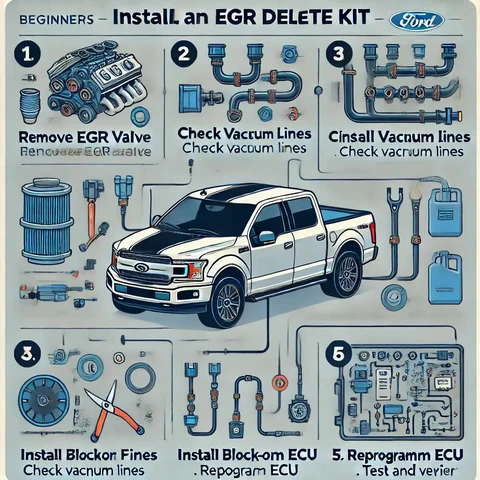
The EGR delete process typically involves:
- Removing the EGR valve – The EGR valve is detached from the intake manifold.
- Blocking the EGR ports – Special block-off plates or plugs are used to prevent exhaust gases from re-entering the intake.
- Reprogramming the ECU (optional) – Some vehicles require software modifications to disable the EGR system electronically.
By eliminating the EGR function, the engine can run cleaner and cooler, reducing maintenance needs and improving longevity. However, it’s important to check local emissions laws before proceeding with an EGR delete. x001cc3gah EGR delete kit installation instructions
How to Install an EGR Delete Kit
Installing the x001cc3gah EGR delete kit requires precision, patience, and the right tools. Here’s a step-by-step guide to ensure a successful installation.
Tools and Equipment Required
Before starting, make sure you have the following tools:
- Socket wrench set
- Screwdrivers
- Torque wrench
- EGR delete kit components (block-off plates, bolts, gaskets)
- Coolant catch pan
- Gloves and safety goggles
- Anti-seize lubricant
Step-by-Step EGR Delete Kit Installation
Step 1: Prepare the Vehicle
- Park on a Level Surface – Ensure the vehicle is parked on a stable surface with the engine turned off.
- Disconnect the Battery – Always disconnect the negative terminal of the battery before working on engine components.
- Drain Coolant – If your EGR system is integrated with the cooling system, drain the coolant to avoid leaks.
Step 2: Remove the EGR Valve and Components
- Locate the EGR Valve – Refer to your vehicle’s manual to find the EGR valve position.
- Remove Connecting Bolts – Using a socket wrench, loosen and remove the bolts securing the EGR valve.
- Disconnect the EGR Pipe – If applicable, detach the EGR pipe connecting to the exhaust manifold.
- Inspect the Area – Check for carbon buildup or clogging in the intake manifold and clean it if necessary.
Step 3: Install the x001cc3gah EGR Delete Kit
- Place the Block-Off Plate – Align the block-off plate with the EGR valve’s mounting location.
- Secure with Bolts – Tighten the provided bolts to ensure a leak-proof seal.
- Check for Fitment Issues – Ensure all connections are properly aligned and sealed.
Step 4: Reassemble and Test
- Reconnect Coolant Lines – If any coolant hoses were disconnected, reattach them securely.
- Refill Coolant – Top up the coolant reservoir if necessary.
- Reconnect the Battery – Restore power to the vehicle.
- Start the Engine – Let the engine idle and check for leaks or warning lights.
Is EGR Delete Bad for the Engine?
Many vehicle owners wonder whether removing the EGR system can negatively impact the engine. Here are the pros and cons:
Benefits of EGR Delete
✅ Improved Engine Efficiency – Eliminating the EGR system prevents exhaust gas recirculation, leading to cleaner combustion.
✅ Reduced Carbon Buildup – Without exhaust gases entering the intake manifold, carbon deposits are significantly reduced.
✅ Better Fuel Economy – A cleaner engine operates more efficiently, potentially improving fuel mileage.
Potential Drawbacks
⚠ Check Engine Light (CEL) Issues – Some vehicles require ECU tuning to prevent warning lights.
⚠ Legal Restrictions – In some regions, EGR deletes are illegal due to emission standards.
⚠ Potential Impact on Turbocharger – Some turbocharged engines rely on EGR function to manage temperatures.
Before proceeding with an EGR delete, always consider your vehicle’s specific requirements and local regulations.
Can I Delete EGR Without DPF?
The Diesel Particulate Filter (DPF) and the Exhaust Gas Recirculation (EGR) system are separate components but work together in emission control.
- EGR Delete Only – You can remove the EGR system while keeping the DPF intact. However, some vehicles might experience increased DPF regeneration cycles.
- EGR & DPF Delete Together – Removing both can improve performance but is often illegal in certain regions.
If you decide to delete the EGR system without removing the DPF, ensure your engine management system can handle the changes to avoid performance issues.
Final Thoughts on x001cc3gah EGR Delete Kit Installation
The x001cc3gah EGR delete kit installation instructions offer a step-by-step guide to removing the EGR system from your vehicle efficiently. While the process can lead to improved engine longevity and performance, it’s crucial to understand the legal implications and potential risks involved.
If you’re considering an EGR delete, ensure you have the right tools, follow the correct procedure, and seek professional assistance if needed. Whether for performance gains or maintenance reduction, a properly executed EGR delete can help keep your engine running cleaner and stronger for years to come. x001cc3gah EGR delete kit installation instructions